Preparation of the PRO-PRP Kit |
| |
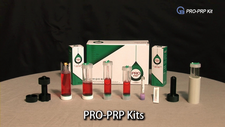 PRO-PRP Kit PRO-PRP Kit
- Select one appropriate Kit out of the PRO-PRP 15cc, 20cc, 30cc, and 50cc Kits conforming to the applications and blood collecting amount
Blood collecting syringe
Disposable 18G syringe needle
- Used when injecting collected blood into the PRO-PRP Kit
PRP injection syringe
Plasma (PPP) collecting syringe
- In case the PPP is needed for other separate applications
Anticoagulant (ACD-A)
- About 10% of the blood amount
Centrifuge
- AC Inverter type
|
|
| |

|
|
| |
|
|
|
|
| |
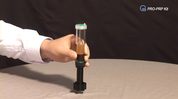
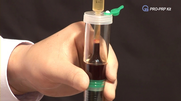
1. Take out the PRO-PRP Kit from its Class IIa gamma ray sterilized package, and open the green cap on the top center port of PRO-PRP Kit.
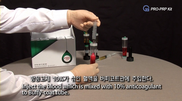
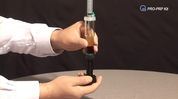
2. Inject the anticoagulant (ACD-A) into PRO-PRP Kit by 10% of the blood amount.
- Example: Inject 3cc anticoagulant for the blood amount of 27cc, when using the PRO-PRP 30cc Kit.
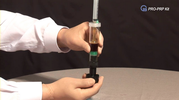
3. Collect necessary amount of blood from the patient with blood collecting syringe.
4. Replace the blood collecting syringe needle with a disposable 18G needle.
- The needle is replaced with 18G one, as the Platelet can be damaged by excessive pressure if the blood is injected into PRO-PRP Kit with narrow blood collecting needle.
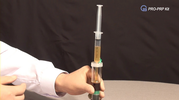
5. Inject collected blood into PRO-PRP Kit up to the circle-line (junction of the upper tube and bottom tube) in the middle of the Kit
6. The PRO-PRP Kit is now ready for centrifugation. |
|
| |
|
|
Centrifugation |
| |
|
|
|
|
| |
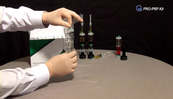
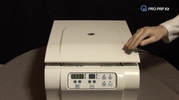
1. Fill up the counterbalance with distilled water to prepare its weight as same as the PRO-PRP Kit.
2. Open the lid of centrifuge, and insert the PRO-PRP Kit in one port of the rotor.
- Model 416G can be used for the centrifugation of all PRO-PRP Kits of 15cc, 20cc, 30cc, and 50cc.
- Supporting bucket is used to fix the 15/20cc Kits in the port of the rotor.
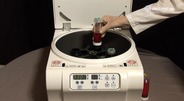
3. Insert the counterbalance in the symmetrical port of the rotor to keep the weighing balance, and close the lid of centrifuge.
4. Push the Soft Start/Stop button dedicated for the centrifugation of PRO-PRP Kit.
Centrifuge operation time of Model 416G
- 15/20cc Kits: 5 minutes at 3,300rpm
- 30/50cc Kits: 5 minutes at 2,800rpm
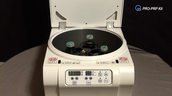
5. Take out the PRO-PRP Kit, when the centrifugation is completed and the lid is opened automatically.
- AC Inverter type 416G Model's idle spinning time is about 2-1/2 minutes until the centrifuge stops completely, after the 5 minute centrifugation time is over.
6. The PRO-PRP Kit is now ready for collecting PRP. |
|
| |
|
|
Installation of Screw-Pusher |
|
| |
|

|
|
|
| |
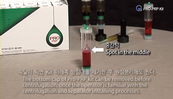
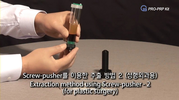
1. Check the complete separation of plasma (PPP), Buffy Coat, and RBC layers in the tube of PRO-PRP Kit.
2. Insert the Screw-Pusher into the bottom of PRO-PRP Kit.
- 20/30/50cc Kits: Replace Kit’s bottom cap with the Screw-Pusher’s own cap, insert the Screw-Pusher, and turn up the screw.
- 15cc Kit: Insert the Screw-Pusher into the Kit’s bottom cap, as it is, and turn up the screw. |
|
| |
|
|
Collection of Plasma (PPP) |
|
| |
|

|
|
|
| |
1. Move out/in the syringe rod once or twice, after removing the needle of plasma collecting syringe, so as the rod can be pushed up smoothly when collecting the plasma.
2. Open the green cap on top center of the PRO-PRP Kit.
3. Insert the tip of plasma collecting syringe firmly into the top center port of PRO-PRP Kit.
4. Turn up the Screw-Pusher to collect necessary amount of plasma (PPP) into the plasma collecting syringe.
- Turn up the Screw-Pusher without inserting the syringe, if no need of collecting plasma (PPP), so as the plasma can be overflown into the top tube of PRO-PRP Kit.
5. Turn up the Screw-Pusher until the RBC layer can reach the circle-line in the middle of PRO-PRP Kit.
- PPP and Buffy Coat (Platelet, WBC) can be collected by 10% of the blood amount, approximately, if the RBC layer is pushed up to reach the circle-line of PRO-PRP Kit. (Example: About 2cc of PRP can be collected in case of the PRO-PRP 20cc Kit)
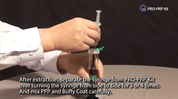
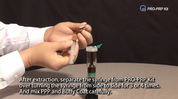
6. Take out the plasma collecting syringe carefully from the PRO-PRP Kit. |
|
| |
|
|
Collection of PRP |
|
| |
|
|
|
|
| |
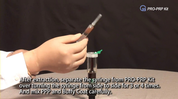
1. Move out/in the syringe rod once or twice, after removing the needle of the PRP injection syringe, so as the rod can be pushed up smoothly when collecting the PRP.
2. Insert the tip of PRP injection syringe firmly into the top center port of PRO-PRP Kit.
3. Keep turning up the screw of Screw-Pusher, while observing the amount and location of Buffy Coat carefully, until the remaining PPP and Buffy Coat can be pushed up into the PRP injection syringe.
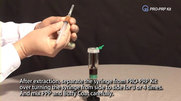
4. Take out the PRP injection syringe from PRO-PRP Kit carefully, after collecting whole amount of the Buffy Coat (Platelet and WBC). |
|
| |
|
|
Injection of PRP |
|
| |
|
|
|
|
| |
1. Insert the needle on the tip of PRP injection syringe.
2. Shake the PRP injection syringe softly side to side in order to mix up the PPP and Buffy Coat well in the syringe.
3. Inject the PRP (mixture of Platelet, WBC, and PPP) collected in the syringe to the patient. |
|
